以VMWare Esxi后台修改硬盘大小后不会自动扩容硬盘大小
Esxi给虚拟机硬盘扩容
前言
以CentOs为例,在VMWare Esxi后台修改硬盘大小后,重启登录机器,不会自动扩容硬盘大小。
Esxi后台扩容
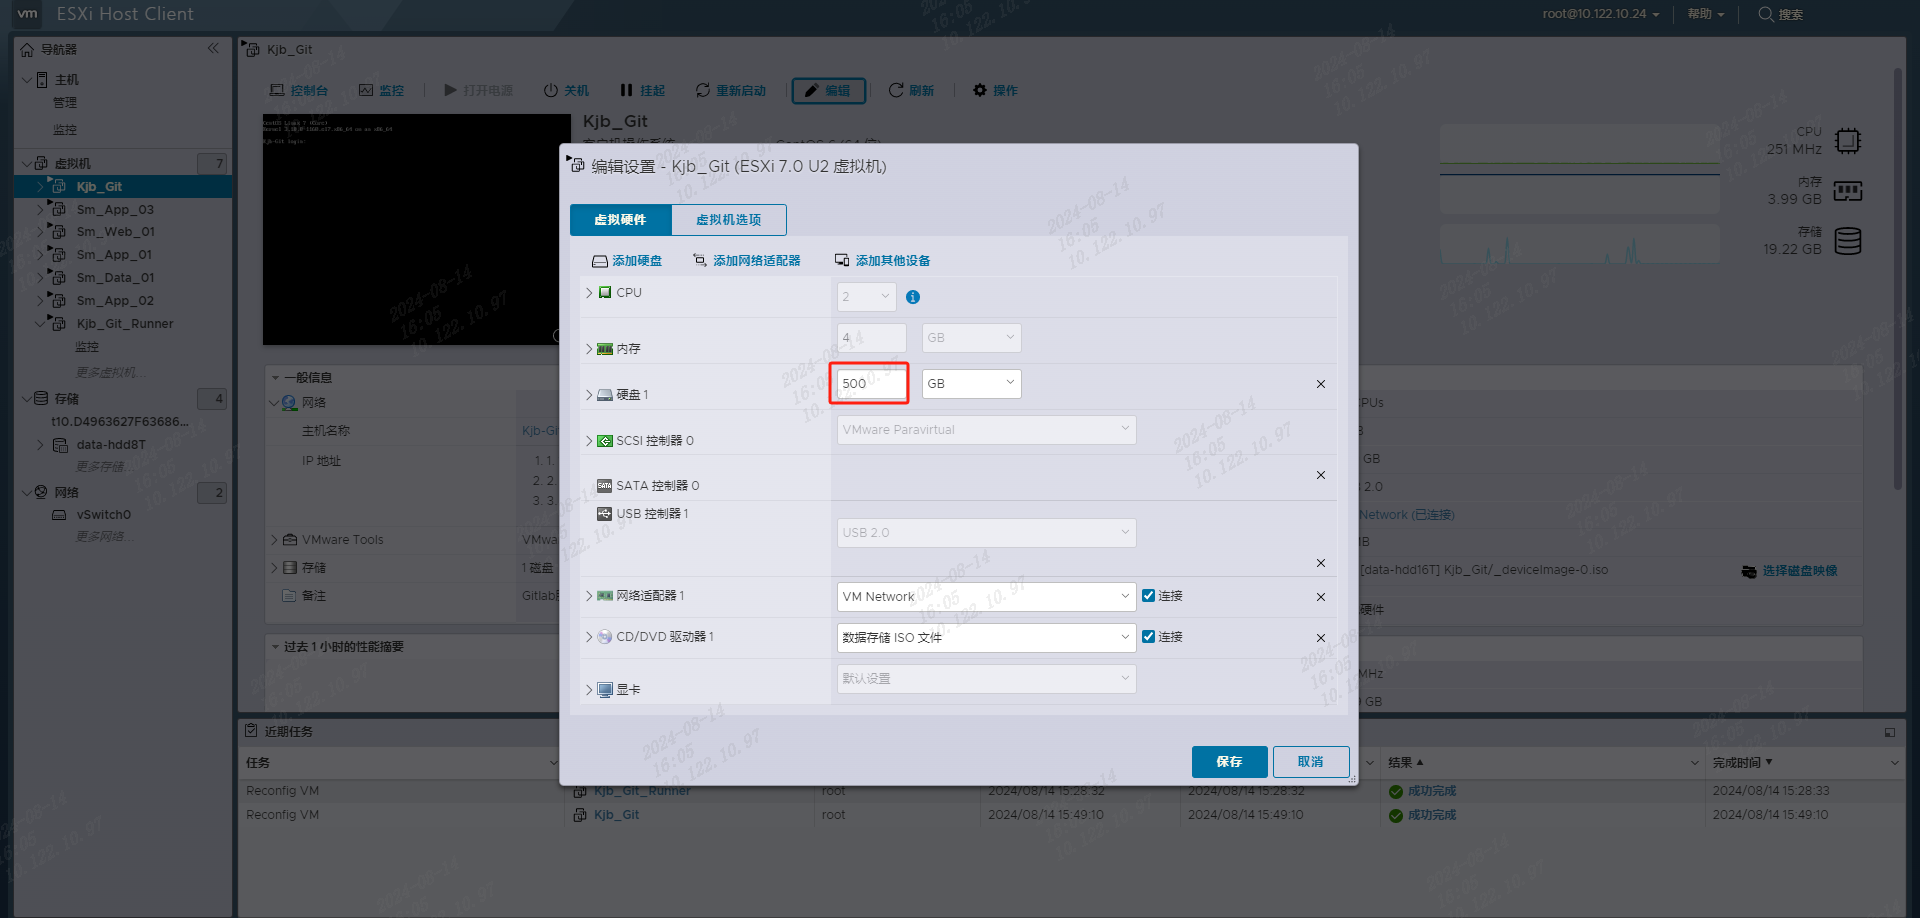
选择需要扩容的机器,点击编辑,修改硬盘大小,重启CentOs系统。

CentOs查看系统当前状态
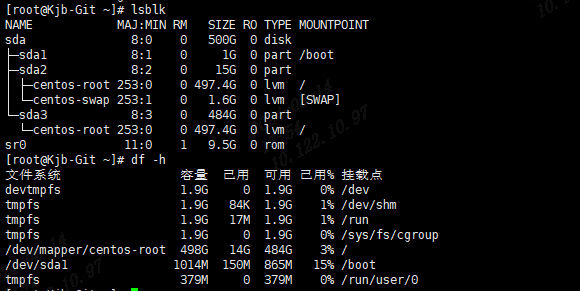
df -h,查看磁盘使用情况。

lsblk,查看当前系统的分区情况。

分配硬盘总量已经是500G,但是系统磁盘大小是14G。
新建分区
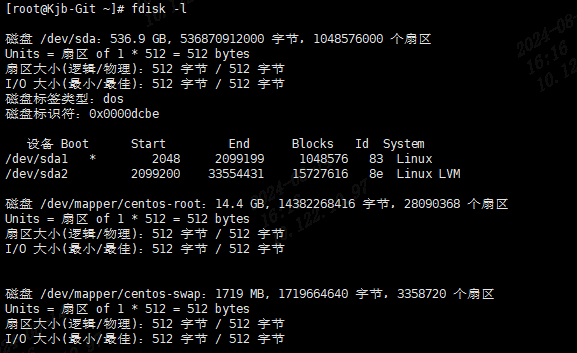
fdisk -l查看磁盘分区情况。

开始扩容
fdisk /dev/sda #通过该命令新增分区
n # n 新增分区
p # 不输入直接回车代表默认p,主分区
# 分区号,直接回车默认即可
# 起始扇区,回车默认即可
# Last 扇区,回车默认即可
t # 设置分区格式
# 分区号,默认
8e # Hex 代码为 8e (8e代表Linux LVM分区类型)
w # 写入分区表,等待分区完成
以下为详情记录
 [root@Kjb-Git ~]# fdisk /dev/sda
 欢迎使用 fdisk (util-linux 2.23.2)。

 更改将停留在内存中,直到您决定将更改写入磁盘。
 使用写入命令前请三思。


 命令(输入 m 获取帮助):m
 命令操作
    a   toggle a bootable flag
    b   edit bsd disklabel
    c   toggle the dos compatibility flag
    d   delete a partition
    g   create a new empty GPT partition table
    G   create an IRIX (SGI) partition table
    l   list known partition types
    m   print this menu
    n   add a new partition
    o   create a new empty DOS partition table
    p   print the partition table
    q   quit without saving changes
    s   create a new empty Sun disklabel
    t   change a partition's system id
    u   change display/entry units
    v   verify the partition table
    w   write table to disk and exit
    x   extra functionality (experts only)

 命令(输入 m 获取帮助):p

 磁盘 /dev/sda:536.9 GB, 536870912000 字节,1048576000 个扇区
 Units = 扇区 of 1 * 512 = 512 bytes
 扇区大小(逻辑/物理):512 字节 / 512 字节
 I/O 大小(最小/最佳):512 字节 / 512 字节
 磁盘标签类型:dos
 磁盘标识符:0x0000dcbe

    设备 Boot      Start         End      Blocks   Id  System
 /dev/sda1   *        2048     2099199     1048576   83  Linux
 /dev/sda2         2099200    33554431    15727616   8e  Linux LVM

 命令(输入 m 获取帮助):n
 Partition type:
    p   primary (2 primary, 0 extended, 2 free)
    e   extended
 Select (default p): p
 分区号 (3,4,默认 3):
 起始 扇区 (33554432-1048575999,默认为 33554432):
 将使用默认值 33554432
 Last 扇区, +扇区 or +size{K,M,G} (33554432-1048575999,默认为 1048575999):
 将使用默认值 1048575999
 分区 3 已设置为 Linux 类型,大小设为 484 GiB

 命令(输入 m 获取帮助):t
 分区号 (1-3,默认 3):
 Hex 代码(输入 L 列出所有代码):8e
 已将分区“Linux”的类型更改为“Linux LVM”

 命令(输入 m 获取帮助):w
 The partition table has been altered!

 Calling ioctl() to re-read partition table.

 WARNING: Re-reading the partition table failed with error 16: 设备或资源忙.
 The kernel still uses the old table. The new table will be used at
 the next reboot or after you run partprobe(8) or kpartx(8)
 正在同步磁盘。
查看磁盘状态
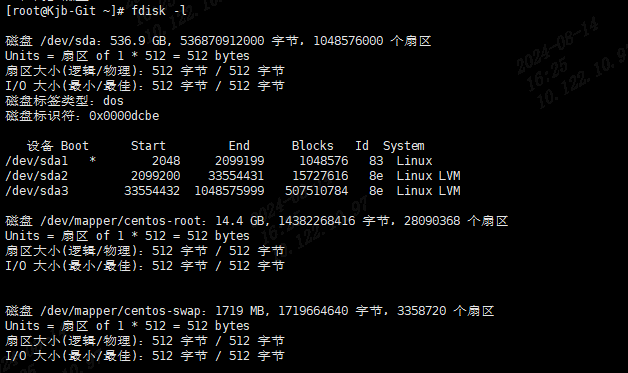
fdisk -l,多了一个sda3的分区。

重新读取分区信息
partprobe命令使kernel重新读取分区信息,从而避免重启系统,使用fdisk工具只是将分区信息写到磁盘,如果需要mkfs磁盘分区则需要重启系统。

合并分区
vgdisplay -v,查看物理卷情况,只有一个/dev/sda2的物理卷。

使用pvcreate /dev/sda3和vgextend centos /dev/sda3命令,创建物理卷及加入组。
vgdisplay -v,再次查看物理卷情况,这里的 /dev/sda3就是新扩容的硬盘了。

通过lvm命令lvextend -l+123903 /dev/mapper/centos-root,将系统盘/dev/mapper/centos-root与 sda3 的123903空余容量合并后退出。最后通过xfs_growfs /dev/mapper/centos-root命令同步文件系统,让系统识别。

再次查看分区情况
扩容成功。

